The Golden Giddyup that Wasn’t

We’ve talked about it on the JRA Podcast, but, if you’re like me, and don’t listen to podcasts, then this is news to you…

A few weeks ago, I was racing the Golden Giddyup. It was a cool race- one of the only opportunities riders will ever have to ride some favorite Front Range trails as a closed course. The course featured both uphill and downhill timed stages, and you could bring whatever bike you wanted depending on where you wanted to focus your speed. Since it’s not terribly difficult to knock out an uphill time on a normal weekday without ruining other trail users’ fun, I decided to take full advantage of the closed course and bring out the Mach 6 for maximum shreddage on the downhill stages.

I wasn’t the only one who was thinking the same way. There are a handful of ladies around here that are incredibly fast downhill, and they were all lined up at the start. I was stoked that the Open Women’s category was the wave to go just behind the Open Men. This meant that we likely wouldn’t be dealing with a dude who wouldn’t let us pass on a stage, which had been one of my biggest fears, given dude’s track records for just looking over their shoulder and trying to go faster when anyone is behind them (especially a woman) and wants to get by.

Stage 1 was uphill on a section of the Chimney Gulch trail (you can look at the Strava page I’ll post a link to below if you need some help knowing where that is). I went kinda hard, but not really. The Mach 6 is a little on the heavy side (around 28 pounds), and it gets a little unwieldy on steep, technical stuff because the bottom bracket is low and the front wheel likes to be off the ground… you know, all the stuff that makes it great at going downhill. So, I ended up walking a rocky section and soon after, pulling over to let the woman behind me pass (somehow I still managed a 3rd fastest time out of the group up that one).

Stage 2 was down the Enchanted Forest and Apex Trails. I got to the start of the stage ahead of the other women and went as soon as I could. Enchanted Forest is cool because, unlike every other exposed, loose-over-hard front range trail, it’s tread is comparatively soft and grippy… and it’s through a forest, as the name suggests. It’s the perfect sort of place for the Mach 6 to shine. It’s got steep downhill droppy root sections that, if you have the nerve for it, you can let loose and straight line. I was doing just that (see Strava page for proof): https://www.strava.com/activities/717363117

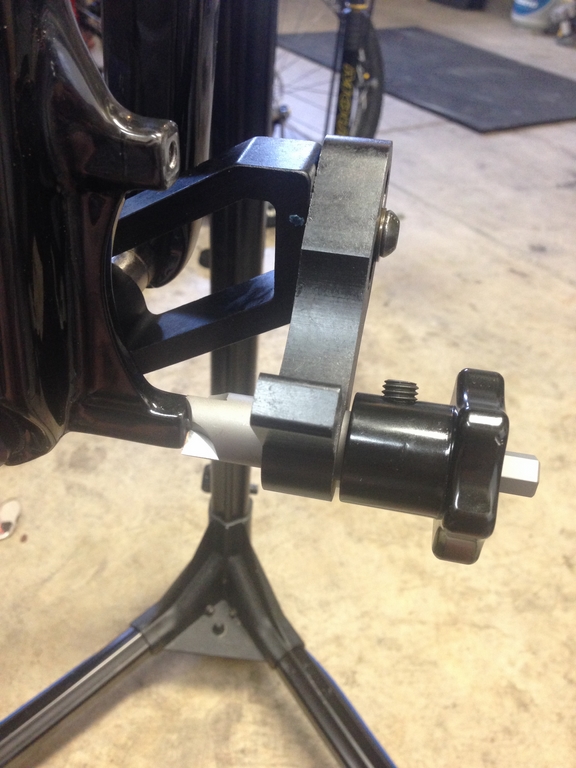
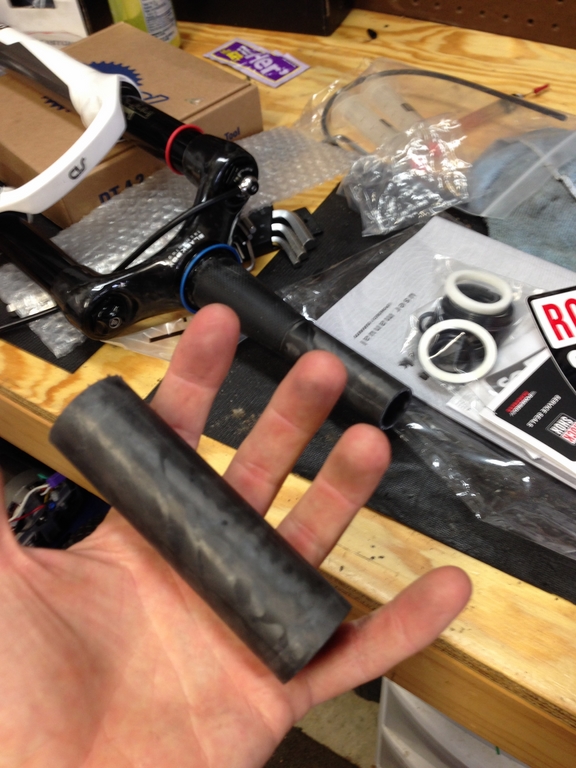
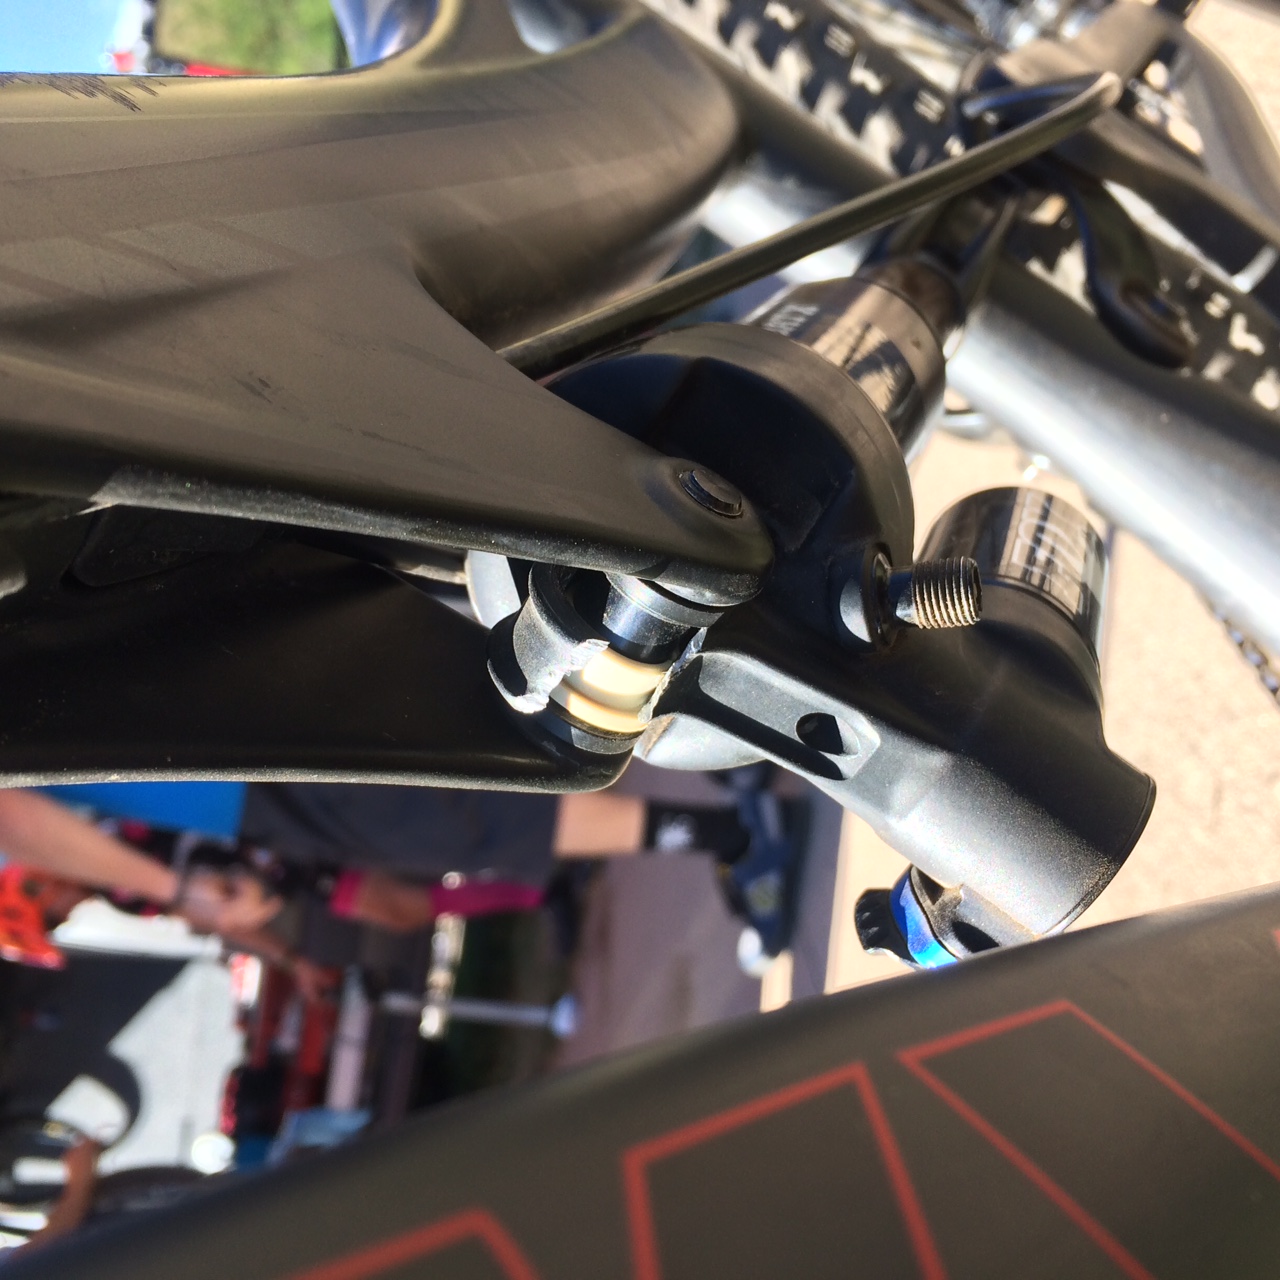
I was feeling really good- somewhere on the edge of being out of control, but not quite. Suddenly, at the end of the Enchanted Forest before the course turned on to the Apex trail, I was hauling the mail down the last major root section, when I heard a bad POWCRACK noise and almost instantaneously lost control of my bike. I managed to lay it down somehwat gently, considering the speed at which I was traveling. I quickly gathered myself off the track to try and continue, but when I picked up my bike, realized that my top shock eyelet had failed… catastrophically. As in, it went from being an O to being a C.

I was sad.

img_9997

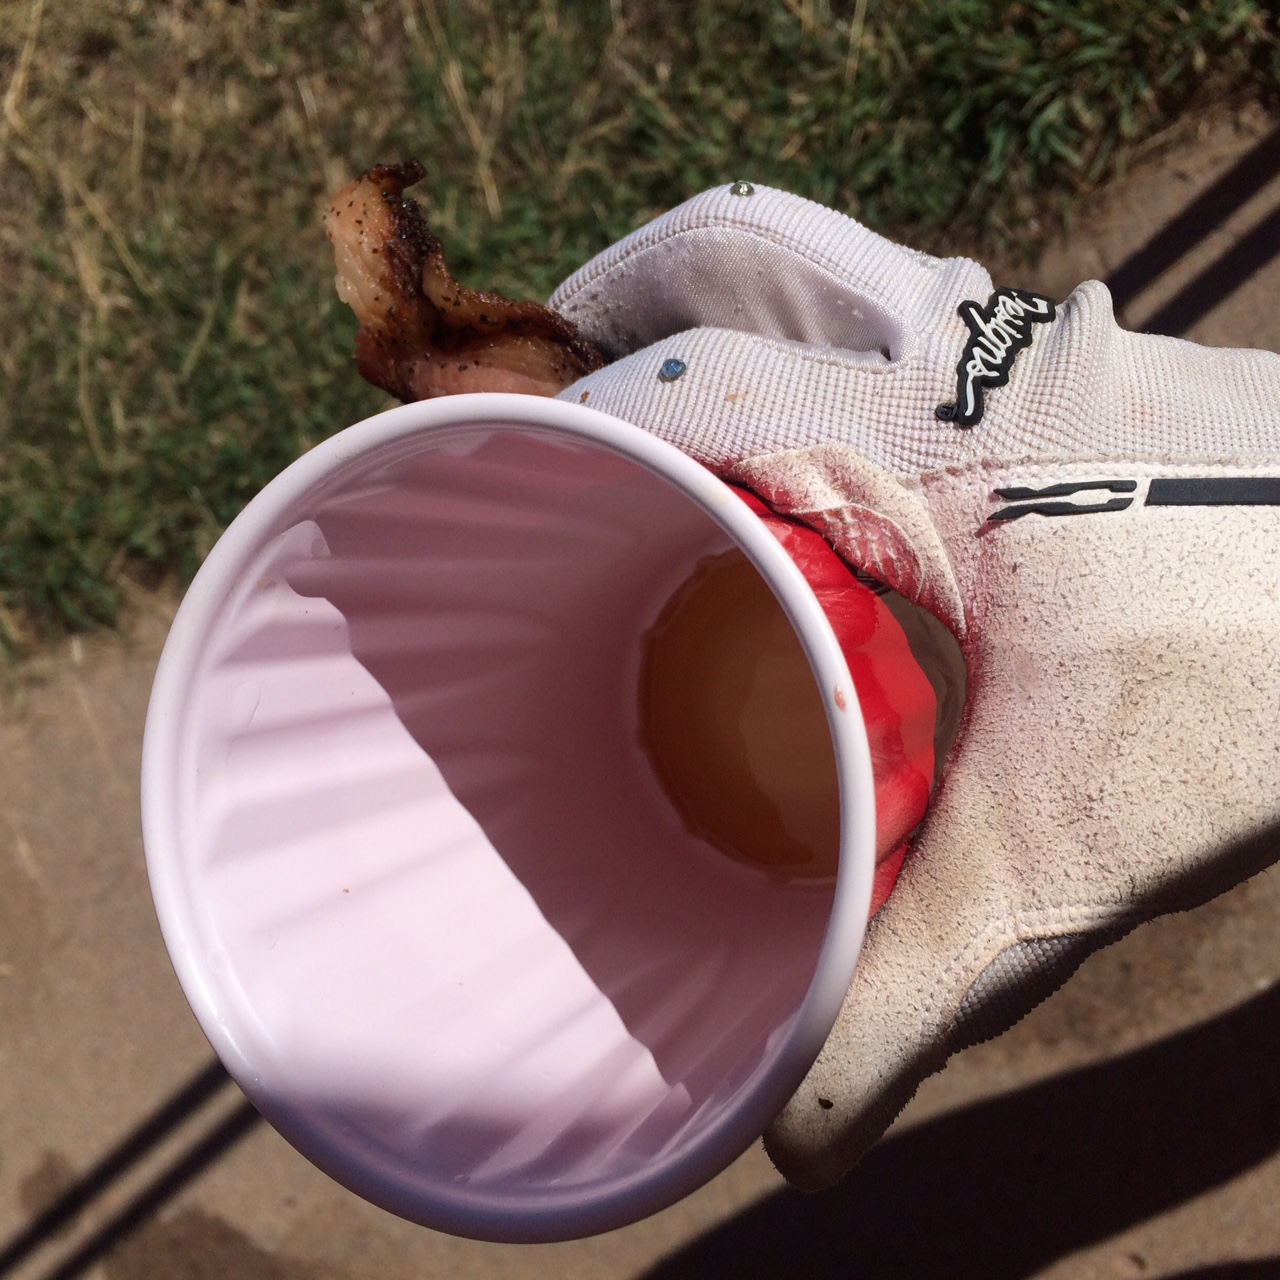
I walked my broken machine down the Apex trail to the neutral support at the bottom, where everyone gawked and said they’d never seen that happen before. I continued being sad and had a shot of Wild Turkey 101 and a slice of bacon.

img_9998

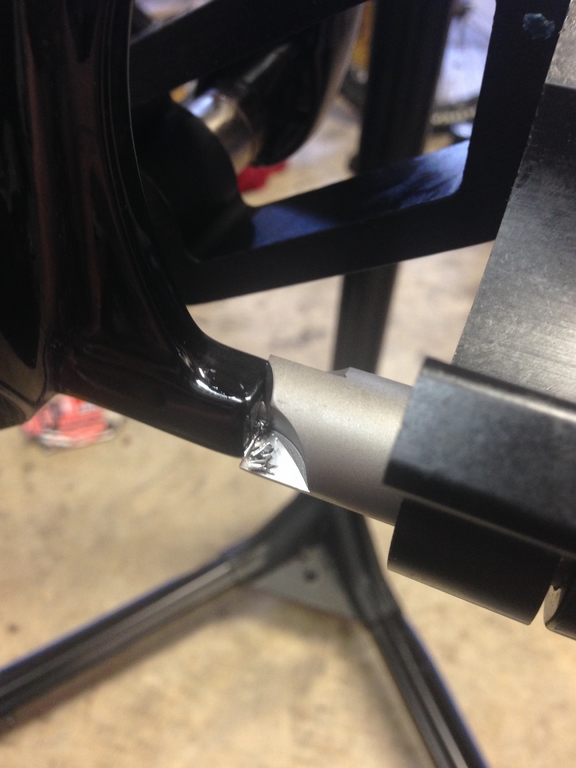
The following Monday, I called up Pivot and explained what happened. It wasn’t their part that had failed, but, in the process of the Fox part failing, the linkage had broken the seat tube on the Mach 6.

img_0008

Even though it wasn’t technically “their fault,” they agreed to warranty the frame, though in order for them to get a warranty shock from Fox, I ended up having to prove to Fox that I hadn’t driven my bike into the roof of a garage whilst it was attached to a roof rack… which wasn’t all that hard to do, considering I had strava, chip timing info, and a couple of people who were willing to vouch for me (including a professional photographer who took a photo of my broken bike on course when I walked past her), and a solid lack of owning a roof rack or being friends with anyone who does.

Don’t expect that sort of treatment from all bike companies. There are some out there that would have given me a warranty shock and crash replacement pricing (maybe) on a new frame, rather than a warranty. Pivot is pretty rad, though, and in the words of their warranty guy, “we want you to be stoked on your bike.”

That, I am. I should have a new Mach 6 back in the stable any day now.

2303862


Shimano M200 Initial Review

Before I get to the shoes- in case you live under the proverbial rock, you need to know that Matt, Kenny (former co-worker and still one of the best mechanics in Memphis), and myself record a podcast every Monday night for Mountain Bike Radio. It’s been going on for just over two years now, and, I’m happy to report, that the Just Riding Along show is has grown to be of the more popular ones on MBR. If you’re a podcast-listening person, I’d highly recommend downloading it (there are several different ways listed on the page if you click the JRA link above), or you can listen straight from the website itself.

Disclaimer- we just recently switched from a live Blogtalkradio recording to a pre-recorded then uploaded show, so the sound quality on the older episodes isn’t the best. They’re worth listening to, though, because you’ll learn about important things like the McNugget currency exchange as well as our special relationship with the armadillo. Once you’ve listened to them all, check out the t-shirt you can pre-order right now on the Mountain Bike Radio Store page. There’s also a post on the Mountain Bike Radio Facebook page to determine if interest warrants the printing of Just Riding Along mugs. The logo is pretty sweet, though I’m a little biased since I came up with the basic idea while trying to entertain my mind on the long and hilly drive to the USARA Nationals a while back. Some time and a million revisions later, the good folks at S2N Design here in Memphis put my idea into action:

JRA

Anyway… enough about that. In Monday’s post, I mentioned that I’d post later this week about the Shimano M200 shoe. I’ve had 3 rides on them now, and I am already a big fan. I’ve been riding in the Mavic Fury, and it is a really nice shoe (aside from the fact that it’s a shoe retailing for over $300 and it comes with the most pitiful excuse for an insole I’ve ever experienced. I have a nice set of Fizik insoles, though, so it works out). The M200 retails at $180 (full disclosure- I bought these, so I have no obligation to say anything nice about them)

I was attracted to the M200 because I do, on someone regular occasions, need to get off my bike and walk to navigate something extremely steep and/or very rocky. The Mavic shoes weren’t totally terrible for that- unlike a LOT of XC shoes out there, the soles have a really grippy rubber lugged sole. I commend Mavic for that because it means they aren’t super light. However, the lugs aren’t just there for show like they are on something like a SIDI (the smallest/most useless/plastic-y lugs I’ve ever seen). In my search for something both stiff and walkable, I’d also tried the Pearl Izumi X-Project, which made my feet really angry because the fit was just… weird. I wasn’t alone in that, either. Both Ryan and Matt had similar experiences.

IMG_6069 IMG_6068

So, when I saw the M200, I was mad stoked (bro), because I know that Shimano shoes generally fit my foot well. I was also intrigued by the extra cleat adjustment area. I generally wear my cleats as far back as a shoe will allow, and, while I ended up starting out by setting them up very close to what I’m used to, the extra space is there if I want to try working the cleat back further. They come with a set of red plastic spacers that install into the cleat area to take up space you aren’t using for cleat adjustment.

IMG_6073 IMG_6072

The closure system is pretty cool, too. I like my shoes to be as loose as possible across the top of the foot (don’t ask… my feet are temperamental to pressure), and having loose-ish velcro straps on top of my feet becomes a tripping hazard. I wear the pull-cord on the M200s just how it is in the photos, and everything is cozy and covered. The extra side coverage is nice in that sense, because it not only gives ankle protection (obviously), but it somewhat distributes the pressure from tightening the top strap up enough to compensate for how loose I wear the bottom.

IMG_6071

On top of the cool, unique stuff I’ve pictured here, as far as I can tell, they pedal like a cross country shoe, and indeed, they are easier to walk in than a cross country shoe due to both some built in flex (which Shimano calls the “Torbal” sole) as well as the additional rubber. The extras make them approximately 30g heavier per shoe than the Fury (I’m not a weight weenie when it comes to contact points, so I’m really just putting that in there for you weirdos who are). Icing on the shoe cake- The insoles are also not just a “here’s some foam to cover the cleat holes” afterthought like the Mavics.

The only downfall to these is how much Matt makes fun of how they look. He called them “storm trooper boots,” which is really a knock on how much he doesn’t know about Star Wars.

Stormtrooper_Corps

I’m hoping to get to Arkansas this weekend and really put them to the test.

New Allies in the Heat Battle

Just when I was conceding defeat to the terrible summer hotness of Memphis, I happened upon a couple of new products that, as of this weekend, are swinging things back in to my favor.

Product #1: the new Gu Brew formulation

Because of my own personal preference for taste and digestibility, I previously diluted my Gu Roctane and Gu Electrolye Brew drink to somewhere in the neighborhood of 90cal per bottle. That’s not a bad strategy, and it worked pretty well for me, but it also meant that while diluting the sugar, I wasn’t getting quite as much of the electrolyte part of the mix.
They’ve now re-formulated the Brew to be lighter on the carb side (it’s 70 calories per serving as opposed to the 90 previous calories). The sodium content is 250mg per serving (with the 500mg per serving blueberry pomegranate option)- similar to the previous version of the mix. Additionally, they’ve now got a “plain” flavor (which I haven’t tried yet), and they’ve got single serve, pocket-sized packets that make it super easy to take your drink mix with you in order to continue consuming it throughout your longer rides.

I tried the lemon lime and watermelon flavors over the weekend, and, I can say that lemon lime tastes good (better than it did previously), and the watermelon is so good that it makes you actually want to drink the whole bottle, even later in the ride, when drinking anything sugary used to seem kind of like a chore.

Product #2: Camelbak Podium ICE Bottles

If you live someplace hot, you know that the previously available versions of insulated bottles aren’t really that good. Both Camelbak and Polar make bottles that, at best, marginally keep your drinks from boiling within the first hour of your ride, but still don’t make that much of a difference… certainly not enough of a difference to warrant dealing with the scum that seems to grow inside of a Polar bottle literally within one long ride (both of the ones I used during Dirty Kanza started the day totally clean and ended the day with scummy spots), or the fact that if you’re not careful with how you drink from a Polar bottle, the top would suck down a little and trap part of your lip with it. The previous version of the Camelbak insulated bottle just didn’t work well enough in the soul-crushing heat to bother paying extra for one or carrying the extra weight.

Enter the Camelbak Podium Ice.

My strategy over the weekend’s rides was to fill two of them with ice, keep one as plain water, and the other as Gu Brew. I drank at least one bottle of Brew per hour in addition to enough water to wash down whatever food I was eating (honestly, with the new formulation of Brew, I could probably go without the plain water, but I didn’t want to get too far off from what’s worked for me in the past). During my Saturday ride, the ice lasted long enough to make two more cold bottles of brew and water at the 2-hour mark. That remaining ice melted during the final hour of the ride, but the drink still remained refreshingly cold.

The result of combining these two products, along with some strategic ride planning (making two loops from the house so I could get an ice refill 3 hours in), meant that I finished my 5+ hours on Saturday feeling nearly as good as when I started, despite the heat index being well over 100 by the final hour.

I’m really stoked on all of it. The new Brew formula is so easy to drink, and the single serve packets make it incredibly convenient  to carry in a jersey pocket on long rides (even the small pockets on my new kits). The combination of that and having constant access to cold liquid is a proverbial game-changer. If you’re someplace oppressively hot, give them a whirl ASAP.


Rain and Stuff

First, to anyone who hasn’t seen it… A photo of me at Dirty Kanza is the headliner in an Outside Magazine article: 200 Miles on 2 Wheels

Of course, my first nationally published photo is of me, looking like I’m about to pull over and burst into tears. It was a photo from early in the race, so I’m not exactly sure why I looked so concerned. I’ll take it, though. It’s otherwise a cool photo and story.

I mentioned storms and trail saturation in my previous post… following that, Mother Nature took that to the next level, and it stormed/downpoured enough that the Wolf River flooded large parts of the Wolf River Trail system that I frequently ride from my house. Flash flooding abounded…

My nicely groomed back yard before/during:

IMG_4572IMG_4613

Marley appreciated the dig-ability of the soft mud once it had stopped pouring:

IMG_4616 IMG_4615

The entrance to the Germatown Greenline:

IMG_4622

And, the concrete ditch you’d normally ride through to go down the Gray’s Creek trail:

IMG_4632

That last one is the day after, as the water was receding. You can see by the mud line on the surrounding vegetation that I would have been standing under water in that spot at the crest of the flood.

The rainy days gave me a chance to finally fix my Whiskey No.7 fork. The brake mount came with a very poor finish from the factory, so it was a struggle to get the front brake adjusted correctly. The guy in their warranty department pulled a *Crank Brothers, telling me it was my job to face the post mounts on a brand new fork. So, the shop had to purchase the tool, and I had to wait until I had time to do the job. The bottom mount seemed to be the problem child… I had to remove a slightly unsettling amount of material from it in order to get proper alignment. The whole process took a little less than an hour (if I had to do it again, without meticulously double checking all of the instructions for each step as I went, it’d still be a 30ish minute process).

IMG_4573

IMG_4574

The small gap between the back face of the cutting guide and the knob of the cutting tool represents the amount of material that needed to be removed from the lower post in order to make it even with the upper post:

IMG_4575 IMG_4576

It works now, but it still chaps my ass that I have to deal with something that shouldn’t be the shop/consumer’s problem.

*”pulling a Crank Brothers” refers to how Crank Brothers’ customer service informed me that I need to disassemble every pair of new pedals that I sold and replace the tiny bit of thin, pixie-dust-esque grease that was in them from the factory with something of a higher quality. They blamed it on a problem with their manufacturer and said that they wouldn’t warranty pedals that fell apart because the grease from the factory dried up within 2 weeks of use.

Between rain storms, I did manage a good bachelorette week while Ryan and Matt were out of town. I locked my keys in my car at a going away party:

IMG_4596

Kicked some stuff hard enough to necessitate the shaping of my ice packs to match my shins (sparring with a big dude = continuation of training in Expert Mode):

IMG_4626

Geeked out about getting a single-stream recycling bin:

IMG_4629

And finally got a new fork for the Cysco Hardtail:

IMG_4646

The only downside of the new fork is that it’s white. Between the black and white fork, the ti frame, and my multi-colored I9 wheels, there are faaaaar too many colors on my bike. I can’t complain too much, though. It is a really, really nice fork that I’m very happy to have. I’m going to ride it down to the Wolf River Trails today and see if the trail looks like it will be dry enough for a 4th of July ride tomorrow.

Odds and Ends

As Kanza is drawing near, I’ve taken to making a few “last minute” tweaks to the Cysco. I’d originally purchased a Problem Solvers EBB 46 for use in the PF30 bottom bracket. My thinking was that it’d make swapping between singlespeed and geared one step easier. However,when I installed it the first time, a couple of things threw up some red flags- number one was the number of various spacers and wave washers (and a reducer shim for the NDS to make a GXP crank work) required to fit various cranks into the bottom bracket.
Once I’d read through the instructions and picked my necessary spacers out of the stack that came with the EBB, I went to install it, and realized something worse than spacers… it’s an incredibly loose fit in the bottom bracket of the frame. My first instinct was to double check that the frame itself wasn’t out of tolerance, and a quick test-fit of a standard PF30 BB revealed that the tolerance of the frame was perfect. The EBB is, literally, so loose in the frame that it rattles around until you torque its two bolts. I torqued it to spec, and, as you’d expect, it started making noise on the first ride.

I can tolerate a little EBB noise on a singlespeed. I’m not one of those people who is super OCD about it. However, I’m not going to listen to it on every single ride for the rest of that bike’s life. So, I put a Wheels Manufacturing PF30 Outboard Bearing BB in it, and it’s totally silent and happy. I may end up trying the newest PF30EBB offering from Niner at some point (if it’s ever actually available as an aftermarket part), because I’m not at all impressed with the Problem Solvers one. The best I can say about it is that it didn’t slip.

Also in the “tweak” category is a ti seatpost. I’ve been waiting on a backordered Niner RDO post. During my time with no RDO post, I’ve been using a standard Thompson, and I’ve found it to be noticeably less comfortable than a carbon post. So, since Poolboy Matt was wanting a Ti post for his bike, he bought a Salsa Regulator post, and is letting me borrow it through Kanza. When I swap that out, I’m also going to change to a different (but equally as tested over long distances) saddle- the getting-hard-to-find Selle Italia Max Flite Trans Am. I have a couple that I’ve been hoarding for situations just like this.

While I’m waiting on that, I’ll do a final test fit of everything today and make sure that all the bags and lights and whatnot can go where they need to go.  Stuff is generally falling into place well- I’ve got my nutrition dialed (mostly Gu Energy Roctane drink, gels, and Chomps, with additional Bonk Breaker Bites thrown in for some solid/easily digestible calories). I’m also using Gu Brew blueberry pomegranate (2x the sodium than regular Gu Brew) as a means of loading up on sodium before (and likely during) the race. Since reading this article from Outside Magazine, I decided to give extra sodium a shot, and, it seems that even on the longer/hotter rides I’ve done, my ability to stay hydrated and keep sweating is noticeably improved.  We’ll see how it goes when the distance and heat are multiplied.

Osprey Rev 12

I mentioned back during my Colorado trip that I’d stopped by Osprey headquarters while I was hanging out at Lauren Hall’s place in Dolores. While I was there, I got one of their brand-new Rev 12 packs (which will also come in two smaller sizes). I used it once in the Breck Epic (during a stage that had a long gap between aid stations), and, since then, I’ve used it for 3-4 hour mountain bike rides, trail runs, an adventure race, and lots of trail work. So far, I’ve been very happy with it…

I’ll admit, I’m a fan of racing without a pack whenever possible. It’s lighter, bottles are faster to refill, and, especially in the summer, you can off-load heat from your back when you’re not wearing one. However, if you’re gonna ride a long way without opportunity to refill on water, or if you just need to carry stuff, you gotta have a good pack.

While the shape may look a little like the Camelbak LR packs that are made to be worn low around the hips, this one is made to be worn higher up like a traditional pack. I’ll admit, I was a little wary of that, because I’ve had my share of neck & shoulder pain from that style of pack. I became a fan, though, because if you take a close look at all the straps, you’ll see they’re all stretchy and form fitting. The result is a much closer, “part of you” ‘fit than any other packs I’ve worn. Since it really hugs your body, it doesn’t budge when you ride/run, and its weight it diffused to more than just your shoulders.

Raise your hand if you’ve ever had a Camelback LR pack rest on the back of your head while you’re going down a steep hill…

IMG_2486

IMG_2485

IMG_2501

I’ve always liked getting a pack with a little extra storage/water space. Materials are so light now that the weight penalty is usually small, and it gives you the option of running light or packing for an all-day adventure. This pack has some good easy-access pockets on the hip belt and shoulder straps. I keep my food and anything else I may need to get to while riding in the hip pockets and use the shoulder pockets to hold trash. The left shoulder pocket has a buckle that lets it flip down (if you’ve got your phone in it, the plastic is touch-screen compatible), and the inner right pocket can unzip and expand to hold a water bottle (I’ve found it more helpful for holding my glasses when they fog up and I take them off). I use the outer elastic cord to hold my Silky Sugoi saw (in its scabbard) when I’m doing trail work.

IMG_2491

IMG_2492IMG_2493

IMG_2494IMG_2495

There are three pockets in the main part of the pack. One holds a 2.5L/85oz reservoir- the newest style one that came in this pack is baffled so that it stays flat instead of teardrop-shaped. It’s also got a quick-disconnect hose at the top so it’s really easy to refill (I’ve found it to be fastest if I hang it off of a chair like in the first photos).

IMG_2489

There’s also a small middle pocket, which I keep a spare tube in, and a large outer pocket, where my pump lives. At the TNAC adventure race, I carried my running shoes in there with room to spare (the baffles in the new reservoir make the outer pocket super roomy all the way down).

IMG_2488 IMG_2487

Oh yeah, the bite valve is pretty trick, too. If you turn it straight out (like in the photo) or back, it’s “off,” and when you turn it 90 degrees, it’s “on.” It also has a strong magnet that attracts cats and holds it to the chest strap.

IMG_2505

If I could change anything about the pack, it’d be to tighten up the two mesh angled pockets between the body and the hip straps (you can kinda see them in the top 2 photos). They’re easy to get to when you’re riding, but they’re pretty loose, so small stuff can fall out of them. If you stuffed a jacket or a bulky pair of gloves in them, you’d be fine, but they don’t securely hold on to things like gel flasks or big air cartridges. If I’m trail riding, I’d tend to stop and take that stuff off, anyway, so it’s not a big deal to stuff them into the outer pocket.

Of the packs I’ve used, this one definitely fits the best. Once it’s on, it fits like another piece of clothing and doesn’t shift or jostle or bother me like anything else I’ve worn. It’s just “there” with all the stuff you want right where you need it.

Anyone want a cat?

Niner Low Top bar and RDO Seatpost- First Ride Impressions

Niner announced a while back that they’d be releasing a new “low top nine” bar and “unstiff” RDO carbon seatpost in a setback version (the zero offset version has been out for a while, but doesn’t work with my fit). Mine came in a little over a week ago, and I finally had a chance to ride them on Thursday.

I decided that since in Breckenridge, the climbs are big and the trails are wide, I’d try leaving the bars in their full 720mm-length glory. I’m still at odds with this decision, though. My test ride was on the trails close to my house- they’re totally flat with the exception of a couple of tiny levee climbs. I definitely noticed that steering was more work with a wider bar. I also noticed that, in the entire 15 seconds I spent going uphill, I reeeeeeeeally liked the wide bar. I’m going to try them on a more tech trail before I do any cutting, and since it’s about to pour down rain, that decision is being put off for now.

IMG_1733

IMG_1731

I installed the bar in the “drop” position (-25 mm) with my stem/spacers in the same orientation as my previous flat bar (the Niner RDO flat bar). This may also change once I get a chance to ride it a little more. I was pretty comfortable with the bar where it was, and, though I like the extra sweep (17 deg vs 9deg) of the lowrider bar, the extra drop may not be necessary. If that’s the case, I’ll flip my stem over.

IMG_1732

IMG_1730


As for the seatpost, the 1 hour ride on buff trail and road was just not enough to notice any difference over the Thompson that was on there previously. I’ll know more in the upcoming weeks. If nothing else, it looks sexy as hell to have matching RDO everything. Blinglespeed Represent!

Product Review: CamelBak Spark 10 LR

I got pretty excited when I saw that CamelBak was making an LR (lumbar relief) pack in a women’s model- the Spark 10 LR. Back when I used to run Ultras, I found that the women’s hydration packs (the ones I liked were made by Nathan) seemed to stay in place better as a function of both the shape/placement of the main shoulder straps as well as the up & down adjustability of the stabilizing strap across the chest.

I’ve been using the original model Charge LR, which is a nice, light pack that holds a 70oz LR reservoir. The LR comes into play with the reservoir shape- it sits low in the pack and  and parallel to the ground rather than vertically from your shoulderblades to your low back. As a result, the weight of your water is carried more by your hips & pelvis instead of your shoulders. I’m a big fan of the design, and I also purchased a Volt LR which is more “all day” sized and holds a 100oz LR reservoir. I’ve yet to go for a ride epic enough to call for that one, though.

My initial impression of the pack was that it’s a nice piece of equipment. It’s got all the bells & whistles of the men’s pack, just in a smaller package… a little too small for me, actually. At 5’6″ I found that with the shoulder straps adjusted long enough to let the pack sit on my hips, the chest strap is as low as it can possibly go, and still maybe a tiny bit too high up. I wouldn’t really call the sizing a downfall to the pack because if you’re smaller, you’re likely going to be super happy with how well it fits you. It’d just be nice to have something on the Camelbak site that’s like, “Hey, this thing is made for people 5’4″ and under. Stick to the other pack, lady.”

The space available in this pack is nice. They’ve enlarged the “wing” parts of it over the previous version, so it’s a lot easier to hold more food and get to them without much fuss. The back storage is bigger, too, but there’s one small detail they overlooked- you have to unclip both sides of the back piece if you want to really get into it for something. First world problems-

IMG_0909

IMG_0908

IMG_0910


I was kinda disappointed in the over-the-shoulder hose routing. I thought that the up & under route of the original Charge was super smooth. That brings me to what I really see as the only super-downfall to this pack. The reservoir has to be shoved in face-first from the “back” of the pack, and, in order to secure it, you have to blindly try and hook the front of the reservoir onto a loop that’s underneath it. No hydration pack is super quick & easy to refill, but this one is downright tedious.

IMG_0905

IMG_0906

IMG_0907


Unfortunately, they’ve carried that design over to the new version of the Charge, as well as to the Volt. I’m not so concerned with the Volt, because I’m not likely to be in a hurry when I’m using it. Along the same lines, if you aren’t expecting to need a refill mid-race (which is likely the case for an XC distance event), this isn’t a big deal for you. However, if you’re doing longer, endurance-type events where you’ll need to refill during the race, just know that it’s not as fast as a lot of other packs.

So, the person who is going to love this pack is smaller than me, and doing rides/races that won’t involve a refill. I’m a little disappointed in it, but, then again, I’m also picky as hell. It is a nice pack, but I’m going to stick with my old Charge LR because of the sizing, hose routing, and ease of use.


Supersix EVO Update

If you don’t know the story, scroll back a couple of days and read it first, lest you be totally lost.

First off, when I was told that the “surefire” bottom bracket cup kit to make my frame work was being overnighted to me, that wasn’t true. It was sent 2-day. When I opened the package, I find that I’ve been shipped a single aluminum bottom bracket cup. Unlike the “wrong” kit that was sent days earlier, which included two bearings, two cups, and an instruction manual, this is just one, bare cup (Joel talked to a C’Dale tech who said that it should have been two). I take a closer look and see that the only difference between this and what I’d received previously was that this was a normal cup that had been honed out a little (it was very obvious by the lack of anodization and scoring on the inside surface)

IMG_0609

I’m not even going to try to build any sort of suspense here. When I installed it into the drive side of the frame with the bearing, the bearing didn’t turn smoothly. It didn’t bind up nearly as much as before, but it made an obvious “click” as it rotated. There’s no way a bearing would remain viable for any length of time in that situation.

At this point, it was after business hours. I called Joel and let him know that on Monday, please inform Cannondale that the only viable options for me are to either A) get a perfect, new frame, NOW, with a perfectly functioning, ceramic bottom bracket installed without any shop-made band-aid fixes, or B) Send the frame back and get a refund. I’m not playing this “lets hone something out and hope it works” crap any more. This bike retails for $7700. I haven’t been able to ride it since OCTOBER.

I’m going to a road race in Arkansas tomorrow morning. I’ll be riding my cyclocross bike.

IMG_0607


Niner Carbon Handlebar vs. Niner RDO Carbon Handlebar

As promised yesterday, I thought it might be helpful to make a quick post comparing these two bars.

First, the obvious differences- weight and cost. There’s a 20 gram and $40 difference between the two. The way I see it, this isn’t really something you should be worrying about at this stage in your decision-making process. If you’re at the point of shopping for a carbon bar, you’ve already spent a bunch of money on a very nice bike. What difference is $40 going to make? If you want the RDO bar, just spring for it, and go out to eat ONE LESS TIME this month. I mean, come on- that’s not even the cost of sushi dinner for 2 people.

Now for the more important part- what about performance/flex/etc?
Of course, all of that is pretty subjective. The bars I’ve ridden in the past before the Niner Flat Top Carbon bars were released were mainly aluminum and carbon Easton Monkey light bars. I’ve also test ridden a customer’s bike with a Crank Brothers carbon bar. I eventually stopped riding the Easton carbon bar soon after I started riding singlespeed. I could feel the Easton bar flex a lot on hard, almost-stallout efforts, and I was a little weirded out by that, so I made the switch to the first alloy version of the Niner Flat Top 9 bar.
Fast forward a bit. I was racing the Shenandoah 100 in 2011 and wrecked going pretty fast on one of the descents. One end of my bar dug into the ground (yeah- bar end and all), and the bar ended up bent (somehow, I escaped with only minor cuts and bruises). When I replaced it, I ended up (under the “you’re not putting another alloy bar back on that nice carbon bike” advice of Mike, the Niner Rep) getting the fancy new carbon bar (the RDO version of anything was not yet released).

I was very pleased with it. It didn’t have scary flex like the Easton bar, but it was much more shock-absorbing & comfy than any alloy bar I’d used. I put it on all of my bikes.
Fast forward again- I ordered my new moondust frame a few weeks ago. Along with it, I decided I’d give the RDO Carbon bar a try. Now that I’ve had a chance to ride the hell out of it in the two most bar-stressful situations (singlespeed on steep/techy stuff and a SS Strength Workout on Wednesday), I have to say, it’s does have more flex, but it’s still not discomforting like the other lightweight carbon I’ve ridden. Do I want to put it on everything? Time will tell. I really love the “non-harsh alloy” feel of the original bar, so I’m highly likely to move the RDO bar to my Air9 RDO and put the stiffer bar back on the singlespeed. The RDO bar is a very nice ride, though. They’ve found a very good balance of stiffness and shock absorption that, unlike my previous experiences, isn’t scary as shit.

So, which one should you buy? Personal preference. The weight and cost are close enough to each other that you should just go with the ride quality you like. The original bar is incredibly stiff-  I’ve never noticed it flex on hard pulls, but it’s still a much nicer ride over rough terrain than an alloy bar. The RDO bar is even moreso a nice ride over rough terrain, and, at the same time, the amount of flex I can feel under load doesn’t make me think that I’m about to rip the end of the bar off and punch myself in the face.

I don’t think you can really go wrong with either one, but hopefully, this info on my experience is helpful for those of you who are still trying to decide.