If you’ve been a reader for very long, you know I like stuff that is absolutely reliable with little to no maintenance. The shifting on my Air 9 Carbon has not lived up to that standard. The cable guide for the internal routing causes too much drag on both front and rear derailleur cables. However, the Air 9 Carbon is, hands down, one of the most awesome bikes I’ve ever ridden, so I’m willing to put some work into making it better. So, the following is a rundown of the modifications I made to work with the cable guide issue…
Step 1: Remove old stuff/prep frame/cable guide
– If you’ve already got cables routed, take the old cables out, but leave the piece of cable housing in the chainstay. You’ll use it to run a guide cable from the rear to the BB in order to guide the housing through later. If you have a bare frame, then you’ll need to run a cable from the chainstay hole to the BB.
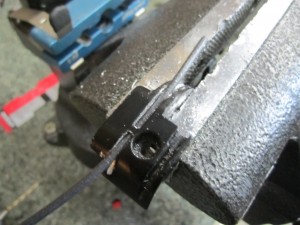
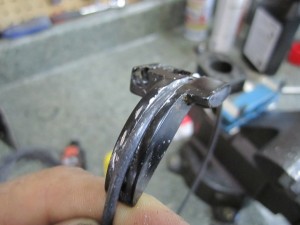
– Remove and drill the cable guide. You need to drill the front derailleur side out enough that a piece of cable liner can fit through it. I clamped mine in the vice at the shop and drilled it for a piece of Nokon liner.
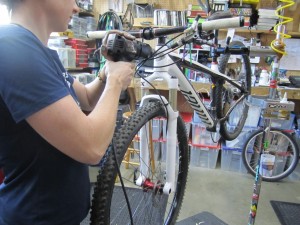
– Next, you have to drill into your headbadge. I chose to go with the side opposite the shifter. I originally had my shift cables routed to NOT cross from headbadge to cable guide, but later routed both the shop demo bike and my bike to be crossed. Crossing the housings in front of the bike and the cables in the downtube results in less bend in the out-of-bike housing from shifter to headbadge, and better shifting. The drilling isn’t all that bad. I just started with a small drill bit and moved up from there until my cable housing would fit through. Periodic blasts of compressed air are good to clear the shavings.
Step 2: Run the housings/cables
-Do the front derailleur first. It’s much easier to run a cable through the frame first- before you’ve run solid rear housing from front to back. I made the mistake of reversing the order when I modded the shop demo bike. Route the cable as normal, but have a piece of cable liner running through the cable guide and out the frame hole leading to the front derailleur.
-Next, measure out a piece of derailleur housing to run from the shifter, though the frame, and through the chainstay. Because of the need to run a guide cable, you need to be pretty precise- if it’s cut too long, you won’t be able to get the end of the guide cable through the entire piece of housing, and getting the housing through the chainstay will be next to impossible. Based on the recommendation of an awesome mechanic from Little Rock that I met at the Ouachita Challenge, I used Jagwire L3 coated housing.
-Run a fresh piece of derailleur cable through the old cable housing you left in the chainstay. Then, pull the housing out and leave the cable (it’s now run from the rear chainstay hole to the BB).
-Run the cable housing from the headbadge to the BB. It will try to go into the top tube, so you’ll need to bend it some to make it aim towards the downtube.
– Once the end of the housing is in the BB area, run your guide cable through the housing. If you’ve cut the housing length right, the cable should be just long enough to pop out of the housing end outside the headbadge. If you’ve got an XL frame, you may need to use tandem cable. Clamp the end of the cable (the one that’s coming out of the end of the housing outside the headbadge) with vice grips. Make them tight- this will allow you to pull on the cable while guiding the housing through the chainstay.
– Now, the hardest part- getting the housing through the chainstay. It takes some finesse mixed with force, but through gentle tugging on the guide cable and pushing on the cable housing, you should be able to get the housing through the chainstay and to the rear derailleur.
-Once that’s through, you’re essentially done with the hard part. Trim the cable housing to be just right, adjust your derailleurs, and enjoy your newly awesome shifting.
I’ll get some more photos and reports up once I’ve ridden a couple of times. Initial impressions are that the shifting is MUCH better than before. Time will tell if the liner for the front cable will hold up. Email or comment if you have any questions!


I can’t wait for the Niner people to hear aboout this. (How about a design job?)
Many people have been doing the same mod. I have drilled out two Carbons and the shifting has been so sweet now. Have not have to change out a cable since.
As I write this, my Air9 Carbon is at the shop being modified in this way. The shifting (especially rear) ahs been terrible with SRAM XX. It was super fast with my old Air 9.
Amazing this wasn’t the original design. I used a round file on the cable guide that fit the cable housing perfect. It was a little challenge overall, but one thing I added to this process was a high quality aluminum cable ferrel that I use on my shift cables. I drilled out the small hole end to basically create a sleeve instead of a stop to stick in the badge hole to eliminate any side to side slop there. Just drilling it out to the cable size worried me it would cut into the cable housing (the drilled out badge hole) over time. Might not have, but I figure this is a nice add on if you have the ability to do this.
My bike’s sat dormant because each time I’ve raced 100+ miles on it it inevitably gets wet along the way at the from derailleur cable hole. Jams the shifting internally after things dry up inside and the grit just acts as a grip in the cable guide keeping things from gliding as they should for the rear. Something I did here to stop this successfully last time was to add a piece of black gorilla tape cut into a nice pleasantly shaped circle and stabbed it with an awl. Stuck the shift cable through that and it’s enough to keep the drippings and loose dust from entering the BB! Between these two fixes hoping this amazing frameset stays functioning smoothly. If not, I’m going single speed!